
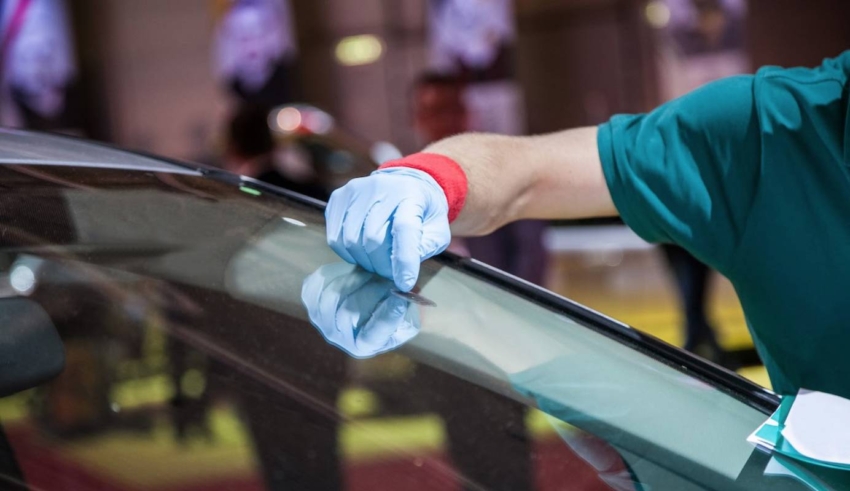
As time goes on, chips and cracks in windshields often become bigger, whether caused by something flying up from the road or another impact. If these chips or cracks grow too large, the entire windshield may need to be replaced. However, it is possible to repair them, and some small chips and cracks can even be fixed at home with a repair kit.
To do this, you will need to:
- Purchase a windshield repair kit from an auto parts store
- Clean the area around the chip or crack thoroughly
- Apply the adhesive patch and plastic pedestal that come with the kit
- Use the syringe in the kit to inject the epoxy resin and allow it to cure before removing the pedestal
- Clean up any excess epoxy and clean the glass
If a chip is smaller than a quarter, it is possible to fix it yourself. However, if it is larger than a quarter or if there is a crack more than three inches long, it is best to have it repaired or replaced by a professional glass service such as auto glass repair in Dallas.
When repairing a windshield chip, it is important to follow the instructions closely. Make sure to purchase a kit with epoxy resin that has not expired, and clean the outside of the windshield before beginning the repair. Never spray glass cleaner directly onto the chip or crack, but instead use a small amount of rubbing alcohol on a microfiber cloth. If the epoxy resin requires UV light to cure, be sure to do the repair on a warm, sunny day. If it has been raining, use a hair dryer to remove any moisture from inside the crack or chip before applying the epoxy.
Repairing a Windshield in 10 Easy Steps
Step 1: Prepare the Patch Peel off one side of the paper backing from the adhesive patch, revealing the adhesive surface. Place the patch over the chip, ensuring that the chip is smaller than the circular cutout in the patch’s center. Apply the patch to the clean, dry side of the windshield. Peel off the remaining paper backing and attach the pedestal, aligning the tabs for easy removal.
Step 2: Mix and Fill the Syringe If required, mix the resin according to the instructions. Pour the liquid resin into the pedestal, filling it up completely. Firmly insert the syringe into the pedestal, ensuring a secure fit.
Step 3: Create a Vacuum Hold the pedestal with one hand while slowly pulling up on the syringe plunger. This creates a vacuum that draws out air bubbles from the resin. Refer to the instructions for the recommended duration. Do not proceed until the air bubbles are no longer visible.
Step 4: Inject the Resin While holding the pedestal, remove the syringe from it. Reinsert the syringe and slowly push down the plunger, forcing the resin into the chip or crack. Stop pushing when instructed or when the clip on the syringe stops the movement.
Step 5: Release Trapped Air Bubbles Gently tap the window with your knuckles to release any trapped air bubbles in the chip. If there are unfilled areas, carefully push the syringe down a little farther (about half an inch), avoiding excessive pressure that may damage the adhesive seal.
Step 6: Refer to Instructions Follow the instructions for the recommended duration of the syringe in this position. Once the epoxy resin is cured, remove the adhesive patch and pedestal.
Step 7: Apply Resin Drops Take the tube of resin and place a drop or two directly onto the chip or crack.
Step 8: Use the Curing Strip Take the curing strip and place it over the chip or crack, ensuring it covers the resin drops. Angle it to prevent air bubbles from getting trapped. Gently hold the strip with your fingers and use a razor blade to remove any remaining air bubbles. Allow the resin to cure for the specified time.
Step 9: Remove the Curing Strip Carefully scrape off the curing strip using a sharp razor blade. Place your finger on top of the chip or crack, then use the razor blade to break the bond between the strip and the glass surrounding the chip or crack. Twist the strip off to avoid pulling out any resin from inside.
Step 10: Clean up Excess Resin Scrape perpendicular to the glass using a razor blade to remove any excess resin left on the surface.
Following these steps will help you successfully repair your windshield, restoring its integrity and ensuring a clear view while driving.


